Are you tired of using a fan oven? Consider a halogen oven instead to bake and roast a variety of dishes. In today’s article, we’re sharing some halogen oven cooking instructions, tips and considerations to make for thoroughly cooked and delicious meals at home.
Before Using Your Halogen Oven
Learning how to use a halogen oven to make the perfect roast chicken shouldn’t be too difficult. But if you’re a first-time halogen oven user, here are some tips before firing up your brand new appliance.
Cleaning Your New Halogen Oven
Once you’ve removed your halogen oven from its packaging, you’ll need to thoroughly clean it before you begin the cooking process.
Soapy water and a sponge will suffice since you want to remove any dust. Then, wipe the oven lid with a damp cloth, ensuring that you don’t touch the control panel and heating element.
Now it’s time to fill the glass bowl with around two litres of water. Next, add some dish soap to remove any bacteria and dust. Wipe the inside of the bowl with a clean, soft cloth. Lastly, pour the water down the drain and wipe the bowl dry.
Set It Up for Preheating
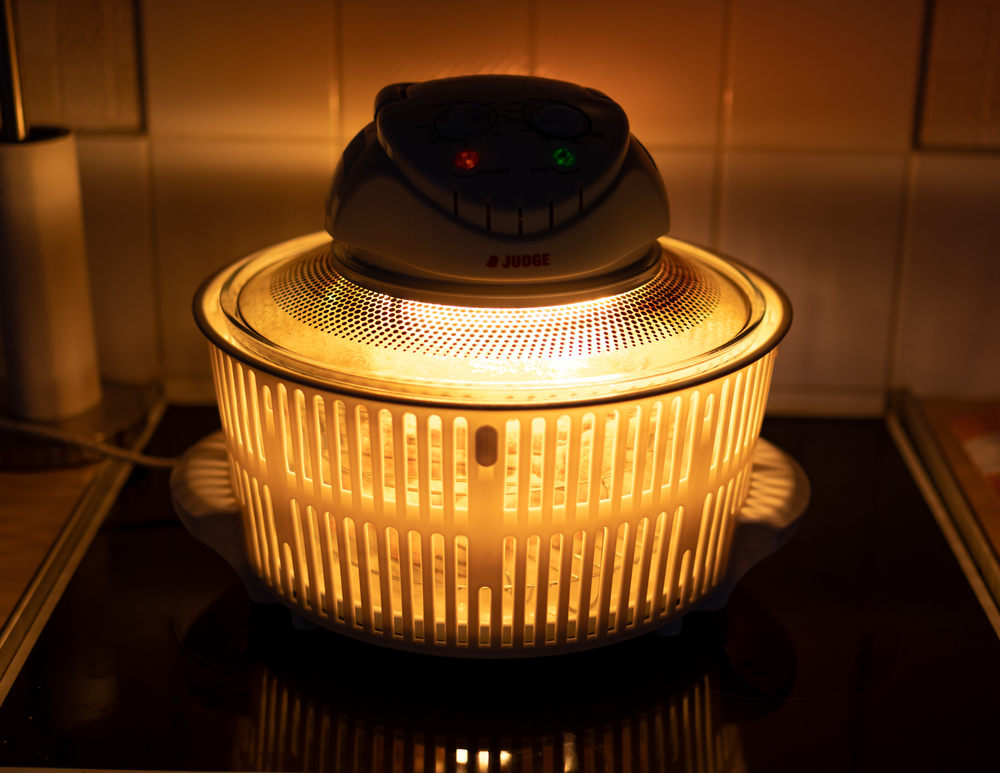
Add the lid back onto the halogen oven by Simply pushing the handle on the lid down so that it clicks. Then, plug the cord into a power socket. Set the oven timer for around 10 minutes, using the up and down buttons to select the right time. Once you’ve done this, the indicator light will light up to show that you’ve set the timer.
Additionally, set the temperature by using the temperature button up to 70 degrees Celsius, and use the temperature light as a guideline that you’ve properly set it.
Cooking With Your Halogen Oven in a Few Steps
Now, your halogen oven is all clean and set up. Since the halogen oven is preheated after 10 minutes, you can begin your cooking methods following the easy steps below.
Step 1: Put the Rack in Place
Begin by putting the low rack or high rack in place inside the halogen oven’s glass bowl. Then, place your food on top of the rack. And if applicable, you can place foil on top of the bowl to keep the food locked inside.
Step 2: Set the Cooking Time
You’re nearly ready to begin cooking, but you’ll need to set the cooking time first. To do so, simply press the timer button and select your preferred cooking time, using the up and down buttons to choose the time. Once the timer has been set, a red light will alert you.
Step 3: Set Your Desired Temperature
Once you’ve inputted the cooking time, you’ll need to select the correct temperature based on the food you’re cooking. Use the temperature button to guide you. Just like with the cooking time, you can use the up and down buttons to help. A red light will notify you that the temperature is set.
Step 4: It’s Time to Cook
Now you’re ready to begin the cooking process. But before you do, make sure to push the handle down until it clicks firmly into place. Then, press the “confirm” button, and your halogen oven will light up. It’ll then begin cooking your food. Once the timer is up, you can remove your meal from the halogen oven and unplug it from the electrical socket.
Some Useful Tips for Cooking With Halogen Ovens
For those new to halogen cooking, here’s some advice that will help you switch to your new cooking device, improve your overall experience, and achieve great results.
Be Sure to Load Food Correctly
The first piece of advice is to fill your halogen oven correctly. A halogen oven has hot air that circulates, so it’s important that the air can reach all areas of your food throughout the process. If you plan to grill food, use the high rack as this will improve the results.
Alternatively, when roasting, baking or reheating food, switch to the lower rack to ensure that your food doesn’t burn.
Always Check Your Food as It Cooks
Halogen ovens cook a lot quicker than conventional ovens, so you’ll need to be more alert as your food cooks. Although you’ll have a cooking timer to guide you, burning food in a halogen oven is easier than in a conventional oven. So, check your food at 10–15-minute intervals.
Adjust the Temperature Accordingly
To make delicious meals in a halogen oven, you need to use the correct temperature, so check that the recipes you follow are for a traditional oven or a halogen oven. If it’s for a normal oven, you’ll need to switch the temperature 20 degrees lower and decrease the cooking time.
Prevent Overcooking
Your new appliance may come with an extender ring. It expands the volume of your halogen oven while reducing the amount of heat that reaches the top of your food, ensuring that you don’t overcook it. This helpful device is great for preventing burning if you are making large dishes like a whole roast chicken.
Practice Safety
As we mentioned earlier, halogen ovens cook food quicker than a traditional oven, so you’ll need to be cautious that your food doesn’t burn. To do so, while you monitor your food at regular intervals, don’t forget to wear oven gloves. Your halogen oven can get very hot.
What do you use your halogen oven for?
— The Souvenir Whisperer 🎁 (@Inzaghi1) January 15, 2021
It’s a multipurpose gadget that can be use for broiling, roasting, baking, heating and even grilling….
You don’t have one yet? Pls fix up, this baby can roast a full chicken in half an hour…. pic.twitter.com/npEvZ5MTdj
The Benefits of a Halogen Oven
Halogen oven users quickly fall in love with their new kitchen gadget after using their appliance just a couple of times. But what are the main benefits of using a halogen oven, and why should you switch to using one?
The most important benefit of using a halogen oven is that their cooking times are about 20% quicker than a normal oven. You can also add frozen food straight to the oven without defrosting it beforehand.
Moreover, a halogen oven uses up to 75% less energy than a normal cooker. This helps you to cut down on your bills.
But you don’t just have to switch up your kitchen gadgets to save money, as these ovens can also help you to become healthier by creating deliciously fried food without the oil.
Additionally, this type of oven is transparent, allowing you to monitor a meal as it cooks without removing the lid and releasing hot air.
Considerations to Make with a Halogen Oven
This appliance can take up a lot of room on your kitchen countertops, which isn’t ideal if you have a small kitchen space. If you have weak wrists or arthritis, you might find it somewhat difficult to remove the glass lid, as they can be pretty heavy.
Additionally, a halogen bulb can get very bright, so you may need to adjust the appliance’s position if this affects you and your tasks. Not to mention that the bulb can sometimes be quite tricky to remove.
What Can Halogen Oven Users Cook?
There are so many recipe books and websites that help you to start cooking with your new halogen oven. Below are some tips for making delectable food at home.
Potatoes
Potatoes are a food staple for many people, and halogen ovens are perfect for cooking roast potatoes, oven chips, mashed potatoes, skin-on fries and potato wedges.
Vegetables
While you can easily make veggies in a standard oven, a halogen oven is an excellent appliance for steaming or roasting your greens. In particular, use your oven for cooking peppers, carrots, broccoli, courgette and more.
Steaming your veggies is a healthier choice as this type of cooking locks in vitamins and nutrients compared to boiling. On the other hand, switch to roasting for a more impactful flavour and texture. Place food directly onto a tray and add oil for crispy veg.
Pizza
Do you know that you can also make pizza in a halogen oven? You can cook and warm pizza in a halogen oven. This includes both homemade and frozen pizzas, and it’ll only take around 10–15 minutes to thoroughly cook.
Using a Halogen Oven
And that is it on how to use a halogen oven correctly and efficiently. If you’re new to these ovens, we can offer several pieces of advice, such as ensuring that you use the low rack or high rack, depending on the dish you’re making and if you want a crispy top layer or not.
You can then set the appliance to your desired temperature and timer to ensure that the ingredients are thoroughly cooked.
We want you to make the most of your new oven, so don’t forget our tip for cooking food at home. Use gloves when handling food and when you are removing the rack from the cooker to prevent burning your hands. Stay alert as your meals cook, and adjust the baking times if required. This is especially the case if you’re new to using this type of oven. Also, make sure that the oven and food have enough air circulation during cooking.
Lastly, regularly clean your oven. It includes the racks, lid and hot glass bowl so you can use it for longer.
Tom is a former chef turned full-time food blogger. He has always been passionate about food, and loves nothing more than experimenting in the kitchen and sharing his recipes with others. Tom’s blog is one of the most popular food blogs on the internet, and he has won numerous awards for his cooking. When he’s not blogging or cooking, Tom enjoys spending time with his wife and two young children.